DIY Plumbing: Fix Common Household Issues Yourself (A Beginner’s Guide)
Let’s face it—plumbing problems always seem to happen at the worst times. Before you panic and reach for the phone to call a plumber, know this: many common issues are surprisingly fixable with a few basic tools and a little know-how. This guide will walk you through solving four of the most frequent plumbing problems yourself, saving you time, money, and stress.
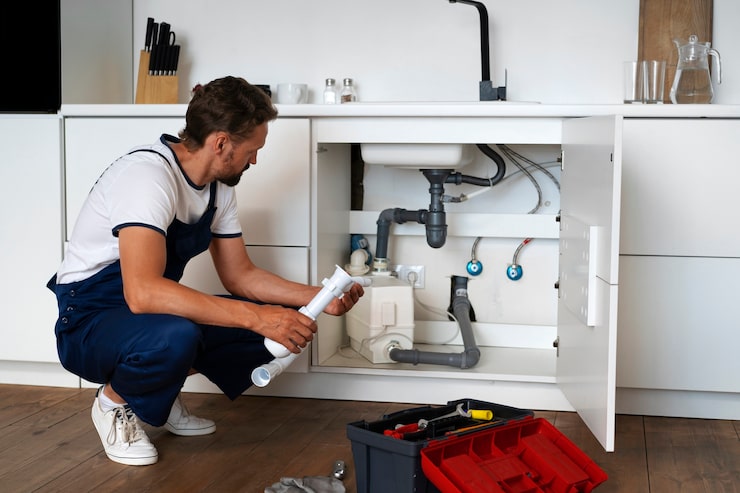
What You’ll Need: The Basic Tool Kit
You don’t need a professional van full of gear. Start with this affordable arsenal:
- Plunger (both cup and flange style): Your first line of defense.
- Adjustable wrench & tongue-and-groove pliers (Channellocks): For gripping and turning.
- Screwdrivers (both flat-head and Phillips): For removing handles and covers.
- Plumber’s tape (Teflon tape): For sealing thread connections.
- Bucket & old towels: For containing spills.
- Drain snake or auger (manual): For tougher clogs.
- Allen wrench set: Often needed for faucet handles.
Problem 1: The Clogged Drain
Symptoms: Slow-draining sink, shower, or tub.
Step-by-Step Fix:
1. Try Boiling Water: For mild kitchen sink clogs (grease, soap), carefully pour a kettle of boiling water down the drain. Avoid this for PVC pipes or if you’ve used a chemical drain cleaner recently.
2. Plunge It:
* Sink/Tub: Ensure there’s enough water to cover the plunger cup. Block any overflow openings (like the sink’s second drain or the tub’s overflow plate) with a wet rag. Place the plunger over the drain and pump vigorously 10-15 times with a good seal.
* Toilet: Use a flange plunger. Create a seal and push in and out firmly, avoiding breaking the seal.
3. The Bent Wire Hanger: For sink drains with a visible clog near the surface, straighten a wire hanger, create a small hook at the end, and fish it up the drain.
4. Use a Drain Snake: Feed the snake into the drain until you feel resistance. Rotate it to break up or hook the clog, then pull it out.
⚠️ Skip the Chemicals: Store-bought drain cleaners are harsh, can damage your pipes over time, and are dangerous if you need to proceed to manual cleaning.
Problem 2: The Running Toilet
Symptoms: A constant hissing or trickling sound, water continuously running into the bowl.
This is almost always an issue inside the tank. Lift the lid and let’s investigate.
Step-by-Step Fix: The Flapper & Fill Valve Check
1. Identify the Culprit: Drop a few drops of food coloring into the tank. Wait 10 minutes without flushing. If color appears in the bowl, you have a leak from the tank to the bowl.
2. Check the Flapper: This is the rubber seal at the tank bottom. Turn off the water valve (located at the wall behind the toilet), flush to empty the tank, and inspect the flapper. Is it warped, cracked, or covered in mineral deposits? Clean it or replace it (a universal flapper from any hardware store costs about $5).
3. Adjust the Chain: The chain connecting the flush lever to the flapper should have a little slack. If it’s too tight, it won’t seal; if too loose, it won’t lift properly.
4. Check the Fill Valve & Float: If the toilet isn’t leaking into the bowl but still runs, the issue is likely the fill valve (the tall mechanism on the left). Adjust the float (the ball or cup) so the water stops about 1 inch below the top of the overflow tube. If adjusting doesn’t work, the fill valve itself may need replacing—a straightforward kit with instructions.
Problem 3: The Leaky Faucet
Symptoms: A persistent drip-drip-drip, usually from the spout.
The cause is almost always a worn-out washer or cartridge inside the handle.
Step-by-Step Fix:
1. Shut Off the Water: Locate the shut-off valves under the sink and turn them clockwise. Turn the faucet on to release pressure.
2. Disassemble: Remove the decorative cap on the handle, unscrew the handle screw, and lift off the handle. Use your wrench to carefully unscrew the packing nut and remove the stem assembly (for compression faucets) or the cartridge (for cartridge faucets).
3. Identify and Replace: Take the old parts to your local hardware store to find exact matches. For compression faucets, replace the rubber washer and any O-rings. For cartridges, replace the whole cartridge. Apply plumber’s tape to any threads when reassembling.
4. Reassemble & Test: Put everything back in reverse order. Turn the water back on slowly and check for leaks.
Problem 4: Low Water Pressure
Symptoms: Weak flow from a specific faucet or showerhead.
Step-by-Step Fix:
1. Isolate the Problem: Is it just one faucet, or all of them? If it’s just one, the issue is localized.
2. Clean the Aerator/Showerhead: Mineral buildup is the #1 cause.
* Faucet: Unscrew the aerator (the small screen at the tip of the spout). Soak it in vinegar overnight, scrub it with an old toothbrush, and rinse.
* Showerhead: Place a plastic bag filled with vinegar over it, secure with a rubber band, and soak for a few hours. Scrub and reattach.
3. Check the Shut-Off Valves: Ensure the angle stops under the sink or the shower valve are fully open.
When to CALL A PROFESSIONAL
Your DIY spirit is admirable, but some situations require an expert:
- Sewage or main drain line clogs.
- No water anywhere in the house.
- Burst pipes or major leaks.
- Installing new gas or water lines.
- If you try a fix and the problem persists or worsens.
Remember: Always know where your main water shut-off valve is located. If a project goes sideways, turning this off stops the flow to your entire house and prevents a minor issue from becoming a flood.
You’ve got this! With a bit of patience and these steps, you can handle these common household hiccups and enjoy the satisfaction (and savings) of a job done yourself. Happy fixing